
FRP tanks are quiet workhorses in many operations, reliably serving year after year as key components in processes that often involve toxic and aggressive chemicals.
But – despite their incredible corrosion resistance, strength and durability – their exposure to chemicals, challenging operating conditions and environmental stresses can gradually affect their structural integrity.
As a result, regular, properly conducted inspections of FRP tanks are important to identify any deterioration, evaluate potential damage and maintain reliable operations.
However, inspecting an FRP tank requires a completely different approach than inspecting a steel tank.
This article explores the key methods and best practices for FRP tank inspection, focusing on non-destructive testing (NDT) techniques and what inspectors should look for when evaluating tank condition.
The information is based on UTComp’s expertise and experience inspecting and assessing the Fitness For Service (FFS) of FRP tanks since 2006.
Below, we cover common questions about our FRP tank inspection process, including:
- What does an inspection include?
- What should be checked internally vs. externally?
- What equipment/testing is required?
What does a FRP tank inspection include?
UTComp conducts FFS evaluation of FRP storage tanks and vessels using our proprietary UltraAnalytix non-destructive evaluation system.
UltraAnalytix provides quantitative information about a tank’s condition, typically while the tank is in operation, without the need for dangerous and expensive confined-space entry, or destructive testing.
In order to ensure long-term reliability and performance of in-service FRP tanks, regular Fitness For Service (FFS) assessment includes a combination of visual inspection, non-destructive data-collection and analysis to evaluate:
- Corrosion barrier condition
- Changes in the composite structure
- Composite strength
- Composite thickness
- Damage caused by corrosion, abrasion, impact, mechanical loads and other environmental factors
Special attention must be paid to high-stress zones of a tank where chemical, mechanical, or thermal forces are most likely to cause damage, including:
- lower sections of a tank
- nozzle connections
- inspection ports
- reinforcement pads
- liquid-vapour interfaces
UTComp FRP tank inspection steps:
Review FRP tank specifications and operating history
Evaluating FFS begins with understanding of the equipment being inspected by reviewing relevant information such as:
- Original design specifications, construction details and material properties.
- Tank geometry, laminate construction and design requirements.
- Stored chemicals, concentrations and potential contaminants.
- Operating temperature, pressure, liquid level and loading conditions.
- Historical inspection findings, repairs, leaks and known damage.
- Changes in operating conditions or process requirements.
Sometimes that information is unavailable, or the equipment has been altered or used in ways that weren’t intended. UltraAnalytix is designed to be adaptable to the real-world context in which the tank’s FFS must be evaluated.
Develop the inspection plan
The next step is developing an inspection plan that identifies the locations where data is to be collected around the circumference of the tank. These condition monitoring locations (CMLs) include high-stress zones on the tank where chemical, mechanical, or thermal forces are most likely to cause damage.
Particular attention should be paid to penetration points or openings in the tank for nozzles, instrumentation or maintenance access.
For example, a nozzle seal bond – which is a critical joint of laminate overlay that connects the nozzle neck to the tank shell or head – is often the weakest point on the equipment. Even in situations where internal access to the tank is possible, there is little that can be done to test the seal bond that isn’t destructive. UltraAnalytix, however, can be used from the exterior of the tank to determine whether there is leakage around the seal bond that may cause problems.
For more, see Practical External Inspection of FRP Vessels (Inspectioneering Journal, 2021).
Perform a systematic visual inspection
A systematic visual inspection should follow a comprehensive checklist of items known to affect the reliability of FRP equipment, including:
- Support structures such as steel beams and concrete pads
- Hold-down anchors, bolts and clamps
- Flanges, nozzles and joints
- Overflow pipes
- Paint and other protective coatings
Collect inspection data
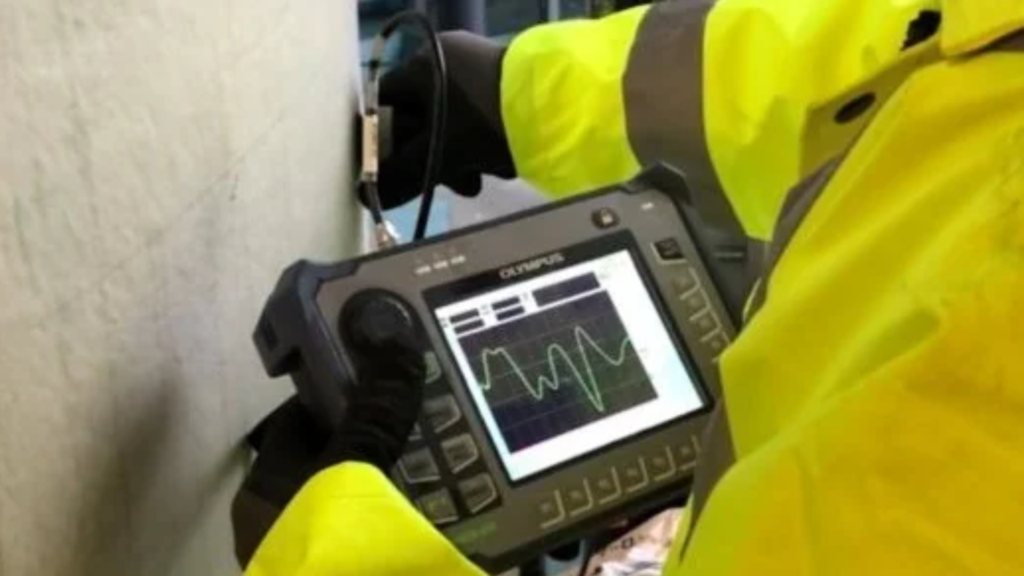
The UltraAnalytix system involves taking ultrasonic readings at each CML using off-the-shelf equipment such as the Olympus Epoch 650 flaw detector configured for UltraAnalytix. The system can be used on FRP of any age and no calibration specimens are required for an inspection.
All inspection data is sent to UTComp for analysis using a patented algorithm that draws on millions of inspection data points for fast, reliable analysis and accurate FFS evaluations.
Compare other NDE techniques.
Analyze the data and quantify polymer condition
To align with WRC-601 and API 579, Part 16, raw inspection data is analyzed to quantify polymer damage through the full thickness of the FRP, including the corrosion barrier. With UltraAnalytix, FRP condition is determined based upon two key factors:
- Polymer Damage Status (PDS): how much of the material’s original elasticity has been retained
- Remaining Strength Factor (RSF): a value based on operating conditions, FRP thickness and PDS that tells whether the material is structurally sound.
What should be checked internally vs. externally?
With UltraAnalytix NDE inspection, there is normally no need for an internal visual inspection of the tank. Data collection takes place from the tank’s exterior surface. There’s no need for confined space entry, or to interrupt operations.
For more information, explore our full FRP tank inspection resource for information on applicable standards, testing methods, fitness-for-service assessments and repair-versus-replacement decisions.